Join me in my adventures as I write romance novels and sew vintage and contemporary fashion.

Sunday, December 21, 2014

Butterick 3721 Men's Victorian Cutaway Coat -- Finished!

I'm happy to report that I finished two coats during my absence from blog writing. I also finished a book for Harlequin and I sold a book to a new publisher--Tule Publishing. I'll be part of their Montana Born series. The book will come out next summer. And now to the sewing...

The first coat I finished was the gray men's Tailoring -- the Classic Guide to Sewing the Perfect Jacket and Simplicity's Sewing for Men and Boys.
Victorian cutaway coat. I learned a lot while making this coat. Instead of following the pattern instructions, I decided to practice tailoring, so instead of getting done in two days, I got done in a month, working in my spare time. I used two main resources:

After doing the pad stitching that I discussed in the last post, I used 1/4 inch twill tape, sewn in by hand, to establish the roll line and to stabilize the edges of the lapels.


I also used twill tape to stabilize the armholes.

I made a chest piece, following the instructions in Sewing for Men and Boys, to keep the hollow of the chest from collapsing.
This is the right chest piece in the photo above and the left coat front in the photo below. Poor photo
planning on my part. :)


I put in an interior pocket, again following instructions from Sewing for Men and Boys, because my husband and son have both commented many times that they wish their coats had an interior pocket. It was actually pretty easy.


I put in a back stay.

Stabilized the bottom of the cutaway with strips of hair canvas.

Left Floydie alone after cutting the lining. Note to self: Do NOT leave Floydie alone.

I sewed the entire lining in by hand. It was fairly relaxing, since I sewed during football games and Boardwalk Empire. I used silk thread to mark the line along which I sewed the sleeves to the body of the lining. I put in a half-inch shoulder pad, but the sleeve head didn't look good, so I took it back out.

Sadly, now that I'm done, I have no one to model the coat, since the future wearer is miles away in San Francisco. So until next Dicken's Fair, I have to make due with Tillie, my unpaid assistant. Her hips are a little too large, and her shoulders a bit too narrow, but she'll have to to do. Please forgive the drag lines.


My one regret...this is a soft, loose weave wool that I used and it's too soft, too droopy. I stabilized it by underlining it with batiste, but it still has a wee bit of a droop. From now on, I'll use wool with a tighter weave when I put this much work into a coat.

I also made a vest to go with the coat. You can just see it peeking out here.


The nice thing about the vest is that I was able to use the gray charmeuse I bought to line the bodice of Vogue 4617. It was too heavy for bodice lining, but perfect for this vest.


Next up--the pink plaid 1940s jacket. See you all soon.


Sunday, September 28, 2014

Progress on Butterick 3721 and a Bad Thing

I made some decent progress on the gray Victorian cut away coat over the weekend--and had a bad thing happen, which I will get to in a bit. I followed the pattern directions for the most part, except for a few added stitches here and there.


The entire front of the jacket is interfaced/underlined with hair canvas. The darts are sewn treating the fabric and hair canvas as one fabric and I did that, thinking it'll help stabilize the loosely woven wool.

I debated, then decided to pad stitch the lapels and under collar. It gave me something to do during the 49er game. There's a victory stitched into that under collar.
The under collar was cut in one piece, rather than two and I went with it. Bottom line, this is a costume coat. The pad stitching really helped the roll of the lapel, though and this is good practice for pad stitching non-costume wear.

I decided to make the slanted welt pocket in the jacket front before doing the pad stitching on the lapel. I have enough fabric to cut another front if something unfortunate happened--but I don't know if I have the patience to pad stitch another lapel. That's probably why the welt pocket went in smoothly. It's even on the correct side.

The welt is actually a lot crisper than it looks in this photo. This wool
photographs lumpy.

Photographed pre-thread-trim.
Now that I'm done with the fronts, I'm underling the rest of the pattern pieces in black batiste...

...and while doing that I discovered the bad thing. The thing that would have been devastating if I didn't have almost two extra yards of wool.

The flaw. And not just a little flaw--a put your finger through it flaw--on the sleeve. And I found it after doing all that pad stitching.


How many times did my mom tell me to always check both sides of my fabric carefully before cutting? Like a zillion. Usually I iron my fabric and thus examine it, however, I steam shrunk this fabric in my dryer, then hung it to cool. Since it was wrinkle free, I simply laid it out and cut. Won't be doing that again.
So that's were I am as the work week looms ahead of me. I'm just thankful I'm still making a gray coat and not a long gray vest.


Saturday, September 20, 2014

Coats, Coats and More Coats

It was 87 degrees here today, so, of course, my thoughts turned to making coats. I have four in the queue and one on the wish list.

The first coat is not for me. Dickens Fair is fast approaching and I've decided to make a new gentleman's coat. I'm thinking cut away instead of a frock coat, using Butterick 3721. I'm making it in gray wool, which is loosely woven so I've decided to underline it with black cotton batiste to give it more body. I plan to start this coat soon--as in within the week.


Following that I plan to make a retro coat using Simplicity 4563, which appears to be from the early to mid-1940s. I have some retro looking plaid wool, which I plan to underline with white cotton flannel to add a layer of warmth. I decided to make the single breasted version because I didn't feel like buying four extra buttons.


Number three on the list is McCalls 6800. I bought some wool online for a purpose I can't recall, and when it came, it was no where near the color I'd thought it would be. It's a cheerful pink with traces of yellow and lavender--more spring than winter, but maybe that's what one needs in the winter. A cheerful coat. I like the fabric...I think. If I don't find a 1960s pattern I like before it rolls around to the number one spot in the queue, then I'll make version A or D of this pattern.


And then there's Vogue 1419 and my accidental linen. I decided to join the LLadybird Vogue 1419 sew along last week and was glad to see that one of the three suggested fabrics for this pattern was linen, because I mistakenly bought coat weight linen (online) last spring thinking it was dress weight. I assumed that the fabric would languish in my stash for years before I found a use for it, but I was wrong. The sew along starts at the end of the month and I'm excited to participate.


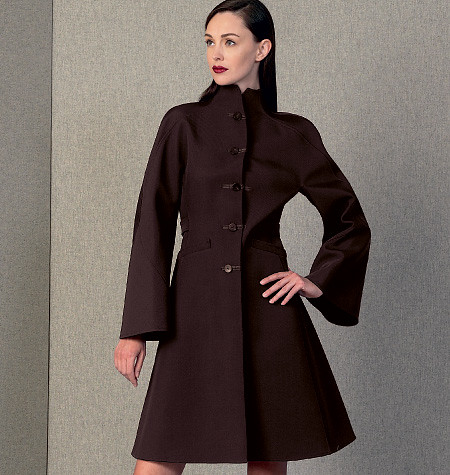
And finally the wish list...I saw this coat pattern, Vogue 8211, reviewed in a back issue of Threads magazine and fell in love. The 2006 out-of-print pattern wasn't on eBay at the time,but I kept checking. Eventually it showed up, but for some reason, only in sizes 6-8-10 and 18-20-22. I fall in the middle, unrepresented bracket. I bought the pattern in the smaller size and plan to grade it one of these days. Once that's done, I'm going to find the perfect fabric; however...I have a feeling that this project will not see the light of day in 2014. It looks more like a 2015 coat anyway.


And that's the plan. Yes, my ambition is greater than my allotted time (winter), but I'm hopeful that I can get at least three of these coats done before spring...just in time for the end-of-winter wool sales.

Friday, September 5, 2014

McCalls 4444--Lobster Dress!

I made a lobster dress this summer.

It started when I bought McCalls 4444 on eBay this spring and asked my daughter to pick out fabric. Nothing appealed and I was starting to think we were going home empty handed, when my daughter told me she'd found a cute lobster print. Cute and lobster are two words that do not generally juxtapose.  I envisioned a lot of red claws and protuberant antennae on a bright background, but instead she showed me this rather tasteful navy blue print. There's nothing like a whimsical arthropod motif for a summer dress. We purchased two yards.

I washed and dried the fabric, laid in out and soon realized that I had a problem--the grain was off just enough that the lobsters wouldn't match if I folded the fabric to cut the pattern. In my world, we match our lobsters, so I laid the fabric out as a single layer and cut the pieces one at a time, matching each side so that the lobsters ran true.
Carefully matched lobsters
After that, I assumed the dress would be a slam dunk, but no. I had pinched out an inch of the bodice and contrast bands when I fit the muslin, so that the bodice didn't gap--and cleverly forgot to add an inch at the back.

My daughter tried the dress on and there was a big problem with the back--as in a two-inch gap between the buttons and the button holes.

I took no photos because I was desperately trying to determine just how I was going to fix it. Take the bodice apart? Frankenstein something together? The back had been so cute before I fixed the front.


While I was considering ripping the contrast off the bodice and maybe crying a little, my daughter calmly suggested adding a ribbon.

Don't you just love a clear mind in a crisis situation?

I cut off the back strap an inch from the vertical strap, tucked the raw edges in, then poked the end of a wide ribbon in the opening. A little hand stitching and viola!

This is one of those dresses that needs a body in it to look good, but hey--look at that matched lobster print!


I love the ribbon! So glad I messed up the back.

And that, ladies and gentlemen, is the Lobster Dress.